HDR. TECHNOLOGY .and .ITS
APPLICATION. TO .PALEOGRAPHY
This page is copyrighted by Mr. Gary S. Dykes © 2007
|
This information is not intended to be comprehensive, rather an introduction to the benefits which High Dynamic Range (HDR) imaging can provide for the study of manuscript images. HDR images are typically defined as: HDR images are stored in a format that can present a much broader range of intensity values per pixel and color channel as compared to LDR (low dynamic range) image formats (your usual JPG, BMP, TIF, and RAW). Generally the HDR format is of 32 bits per color space = 96 bit images. 24 bit images have a gamut display of 0 - 255, HDR can display 0 - 65536, a vast increase in display values! This range of intensity often appears as an increased radiance, or luminance and enhanced clarity. Colors are brighter and more vivid. Details in dark areas can be made visible, and details in very bright areas can also be made visible, in the same image! Lossless storage of HDR images generated with HDR creation tools are usually saved in the following image file formats: OpenEXR, Radiance RGBE (a.k.a. as .HDR) and TIFF with 32 bits per color channel. Since a HDR image can be the union of 27 or more images into a single image (!), that single HDR image contains vast amounts of data. When such a HDR image is "tone mapped" the operator can condense the data to selectively enhance output to a common LDR image. This produces the obvious superior results. Also note this quote: 32-bit images (i.e. 96 bits per pixel for a color image) are considered High Dynamic Range. Unlike 8- and 16-bit images which can take a finite number of values, 32-bit images are coded using floating point numbers, which means the values they can take is unlimited. It is important to note, though, that storing an image in a 32-bit HDR format is a necessary condition for an HDR image but not a sufficient one. When an image comes from a single capture with a standard camera, it will remain a Low Dynamic Range image, regardless of the format used to store it. When applied to the imaging of manuscripts, [and on this site, we mean Biblical manuscripts!] HDR images can present data in a clearer format. When tone mapped and then saved to a LDR format, the resulting LDR images (BMP, JPG, RAW, PSD, et al) display the increased vividness, often with increased readability. This can thus, be a useful graphics tool for the student or researcher. A RAW image format can contain more data than a 24 bit image, but not nearly as well as a true HDR image, as it contains data from just a single image from a single exposure. What we end users need, is for original sets of bracketed images of the manuscript(s). With these bracketed image sets we can apply HDR technology and produce absolutely superior results! I shall display some samples below, and clarify the tools needed and clarify the steps needed to produce and use the benefits of HDR imaging. I also provide tools for free, and links to other tools. All tools and image processes can be accomplished with Windows 98 SE, as well as the newer versions of Windows (XP, Windows 10 etc.) and some will run on recent Apple computers. Other tools are also listed. A Pentium III is the minimum recommended CPU, and at least 256 MB of RAM, but 4 gigs of RAM really speeds things up! A good image editor is recommended (Photoshop, Paint Shop Pro, SilverFast HDR studio, or Picture Window). Please feel free to download the free software(s), and begin experimentation. With software(s), you will be able to produce true HDR files if you have sets (or can make sets of) bracketed images. You can even use one image and create a pseudo-HDR image. |
|
True HDR images are created by joining multiple images, images of the same subject, but of different exposures. Bracketing is an applicable term, taking multiple shots of the same manuscript page, but each at a different exposure (F-stop, or EV setting). Often 5 separate images provide for a good HDR image; but as few as two can be used, and probably as many as 27 or more. Generally, the images progress from very dark to very light, separated by equal f-stops, such as 1 or 2 f-stops [or even 1/3 stop intervals]. For example: -2 EV, then a -1 EV, then a 0 EV, then a +1 EV, then a +2 EV. et cetera. These separate images are then joined in a HDR creation program. The resulting HDR image seems awful, but when tone mapping is applied the magic of HDR begins to become apparent! The images MUST be made without movement of the camera or of the object! A tree on a windy day, would produce BAD results. A tripod is a necessity. Both D-SLR and many Point-and-Shot digital cameras can do the job. Most of us will never ever, have the opportunity to shoot a genuine ancient Biblical manuscript; however we can still use HDR to clarify single color images, as demonstrated below. For those who actually shoot (photograph) the manuscript(s), HDR imaging can improve many images and ought to be considered as optional views [or even as the primary view!] alongside the normal color images. Bracketing images, will require extra time and processing, but in some situations can be very beneficial. HDR works best when the HDR image is created from numerous high quality exposures. I repeat, it works BEST when multiple exposures are first joined. In some situations, a flat-bed scanner can also produce separate images suitable for HDR images -- if the scanner software allows for histogram or curves adjustments for each scan. Since color is enriched and intensified in HDR images, the resulting colors will appear to vary from the original photograph/manuscript. Many HDR operators (used in the tone mapping stage) however, produce good to superior color fidelity, some obviously alter the colors somewhat (Fattal et al). "Tone mapping" is the adjustment/operations applied to a HDR image; this tonal adjustment (tone mapping) compresses the 96 bit tonal data down to a viewable 24 bit image (a LDR format, such as a JPEG, BMP, PSD, TIFF). So two steps are needed: (1) creation of the separate images/exposures, and joined in a single HDR image format, and (2) tone mapping the resulting HDR to produce a standard (but improved) 24 bit image (JPG, BMP, TIF, et al).
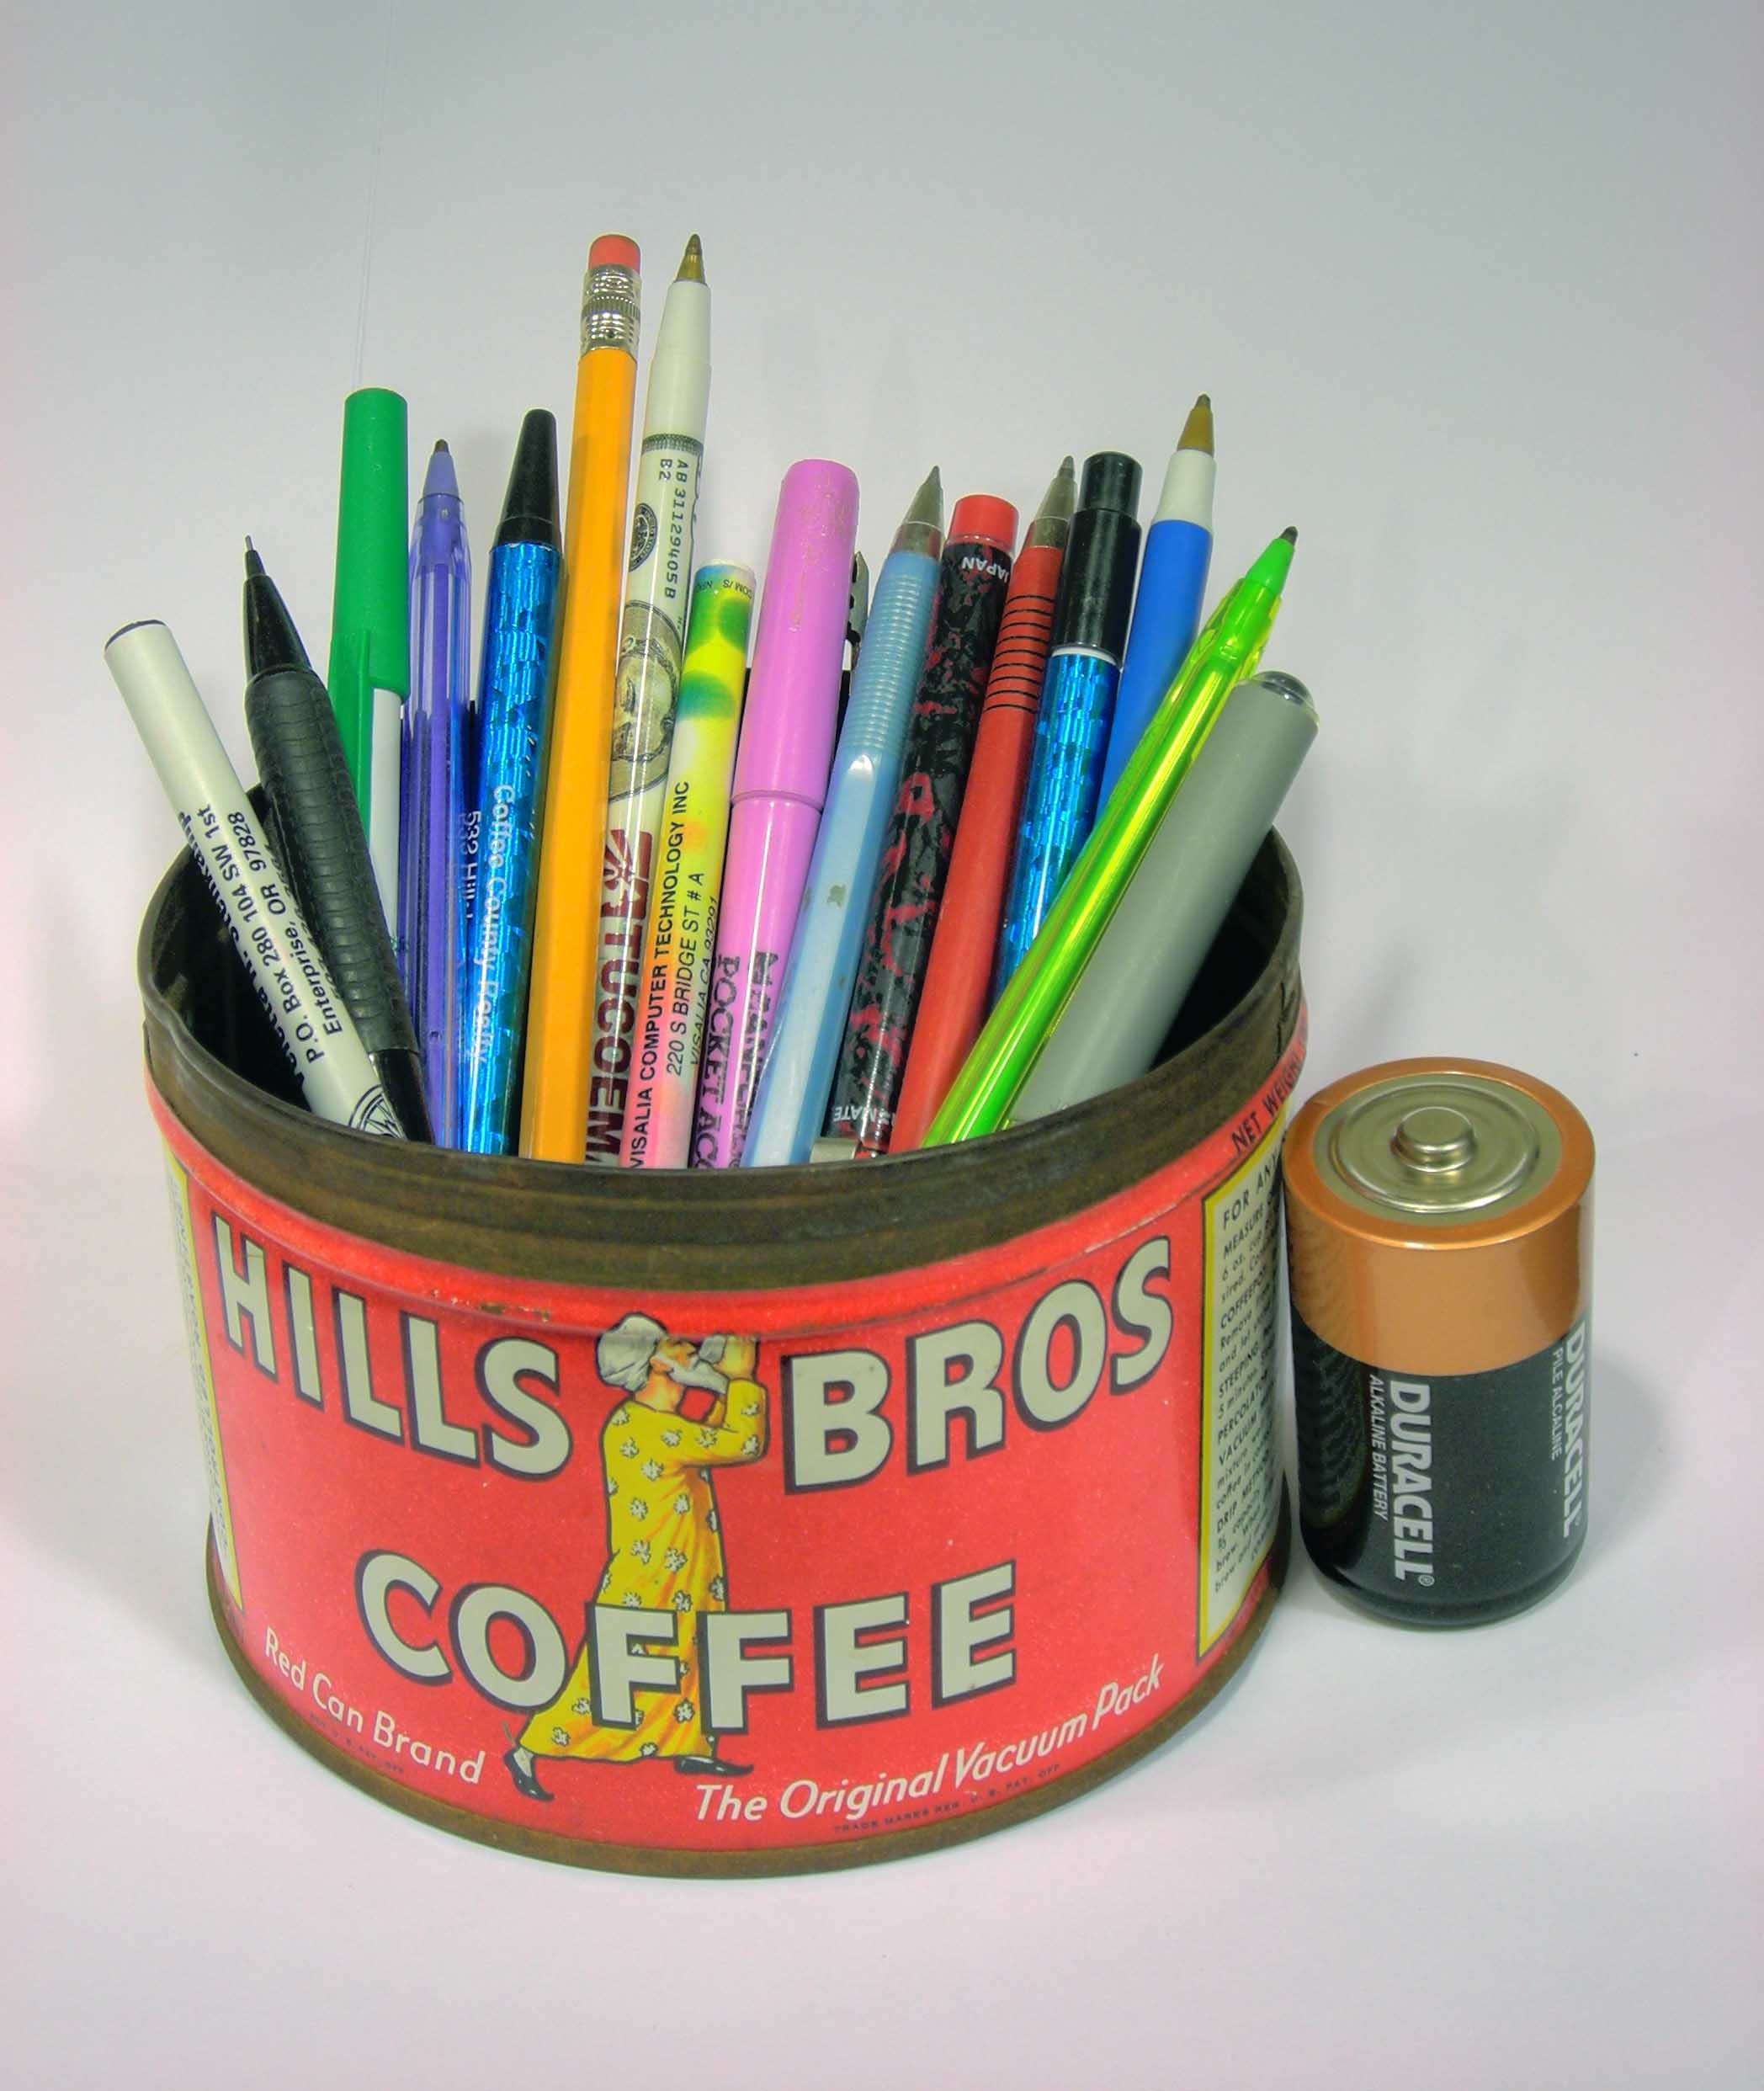
Several software programs do both steps quite well. The compression of the HDR image from 96 bits down to 24 bits, only affects the tone data, not its resolution or size. Below is a sample project; a scene was set up and shot with 5 different exposures (in this case differing EV values). Thumbs of the five exposures appear as such: (each a jpeg as output by the camera)
The middle image was at an EV setting of "0". And when enhanced in Photoshop this is how it appears:
Not a bad image! Good color and contrast. But now see the results of a tone mapped HDR image of the same subject!
The difference is stunning to me. The above product, is in JPG format, and has been compressed from its glorious TIF original. It is a true HDR tone-mapped product. When the 5 jpeg images were joined, I tone mapped them in the same software program which joined them (to form the HDR). In this case the program was Photomatix. Photomatix allows for various adjustment to the HDR image when tone mapping it -- such as gamma control, color saturation, white and black points, color temperatures, et cetera (note my "red" color above is a bit too saturated, however it sure looks like a new can except for the rust on the lip edge (it is from the 1950s) but this can be adjusted). Notice the reflection from the side of the can onto the side of the battery, compare with the above non-HDR image. Other users may produce a different result depending upon their preferences, and it is fun to learn to use the program and make the adjustments. I saved the tone map to a tiff file. I then converted it to a smaller JPEG for the above.
So now, let us move on to imaging a Biblical document.
|
|
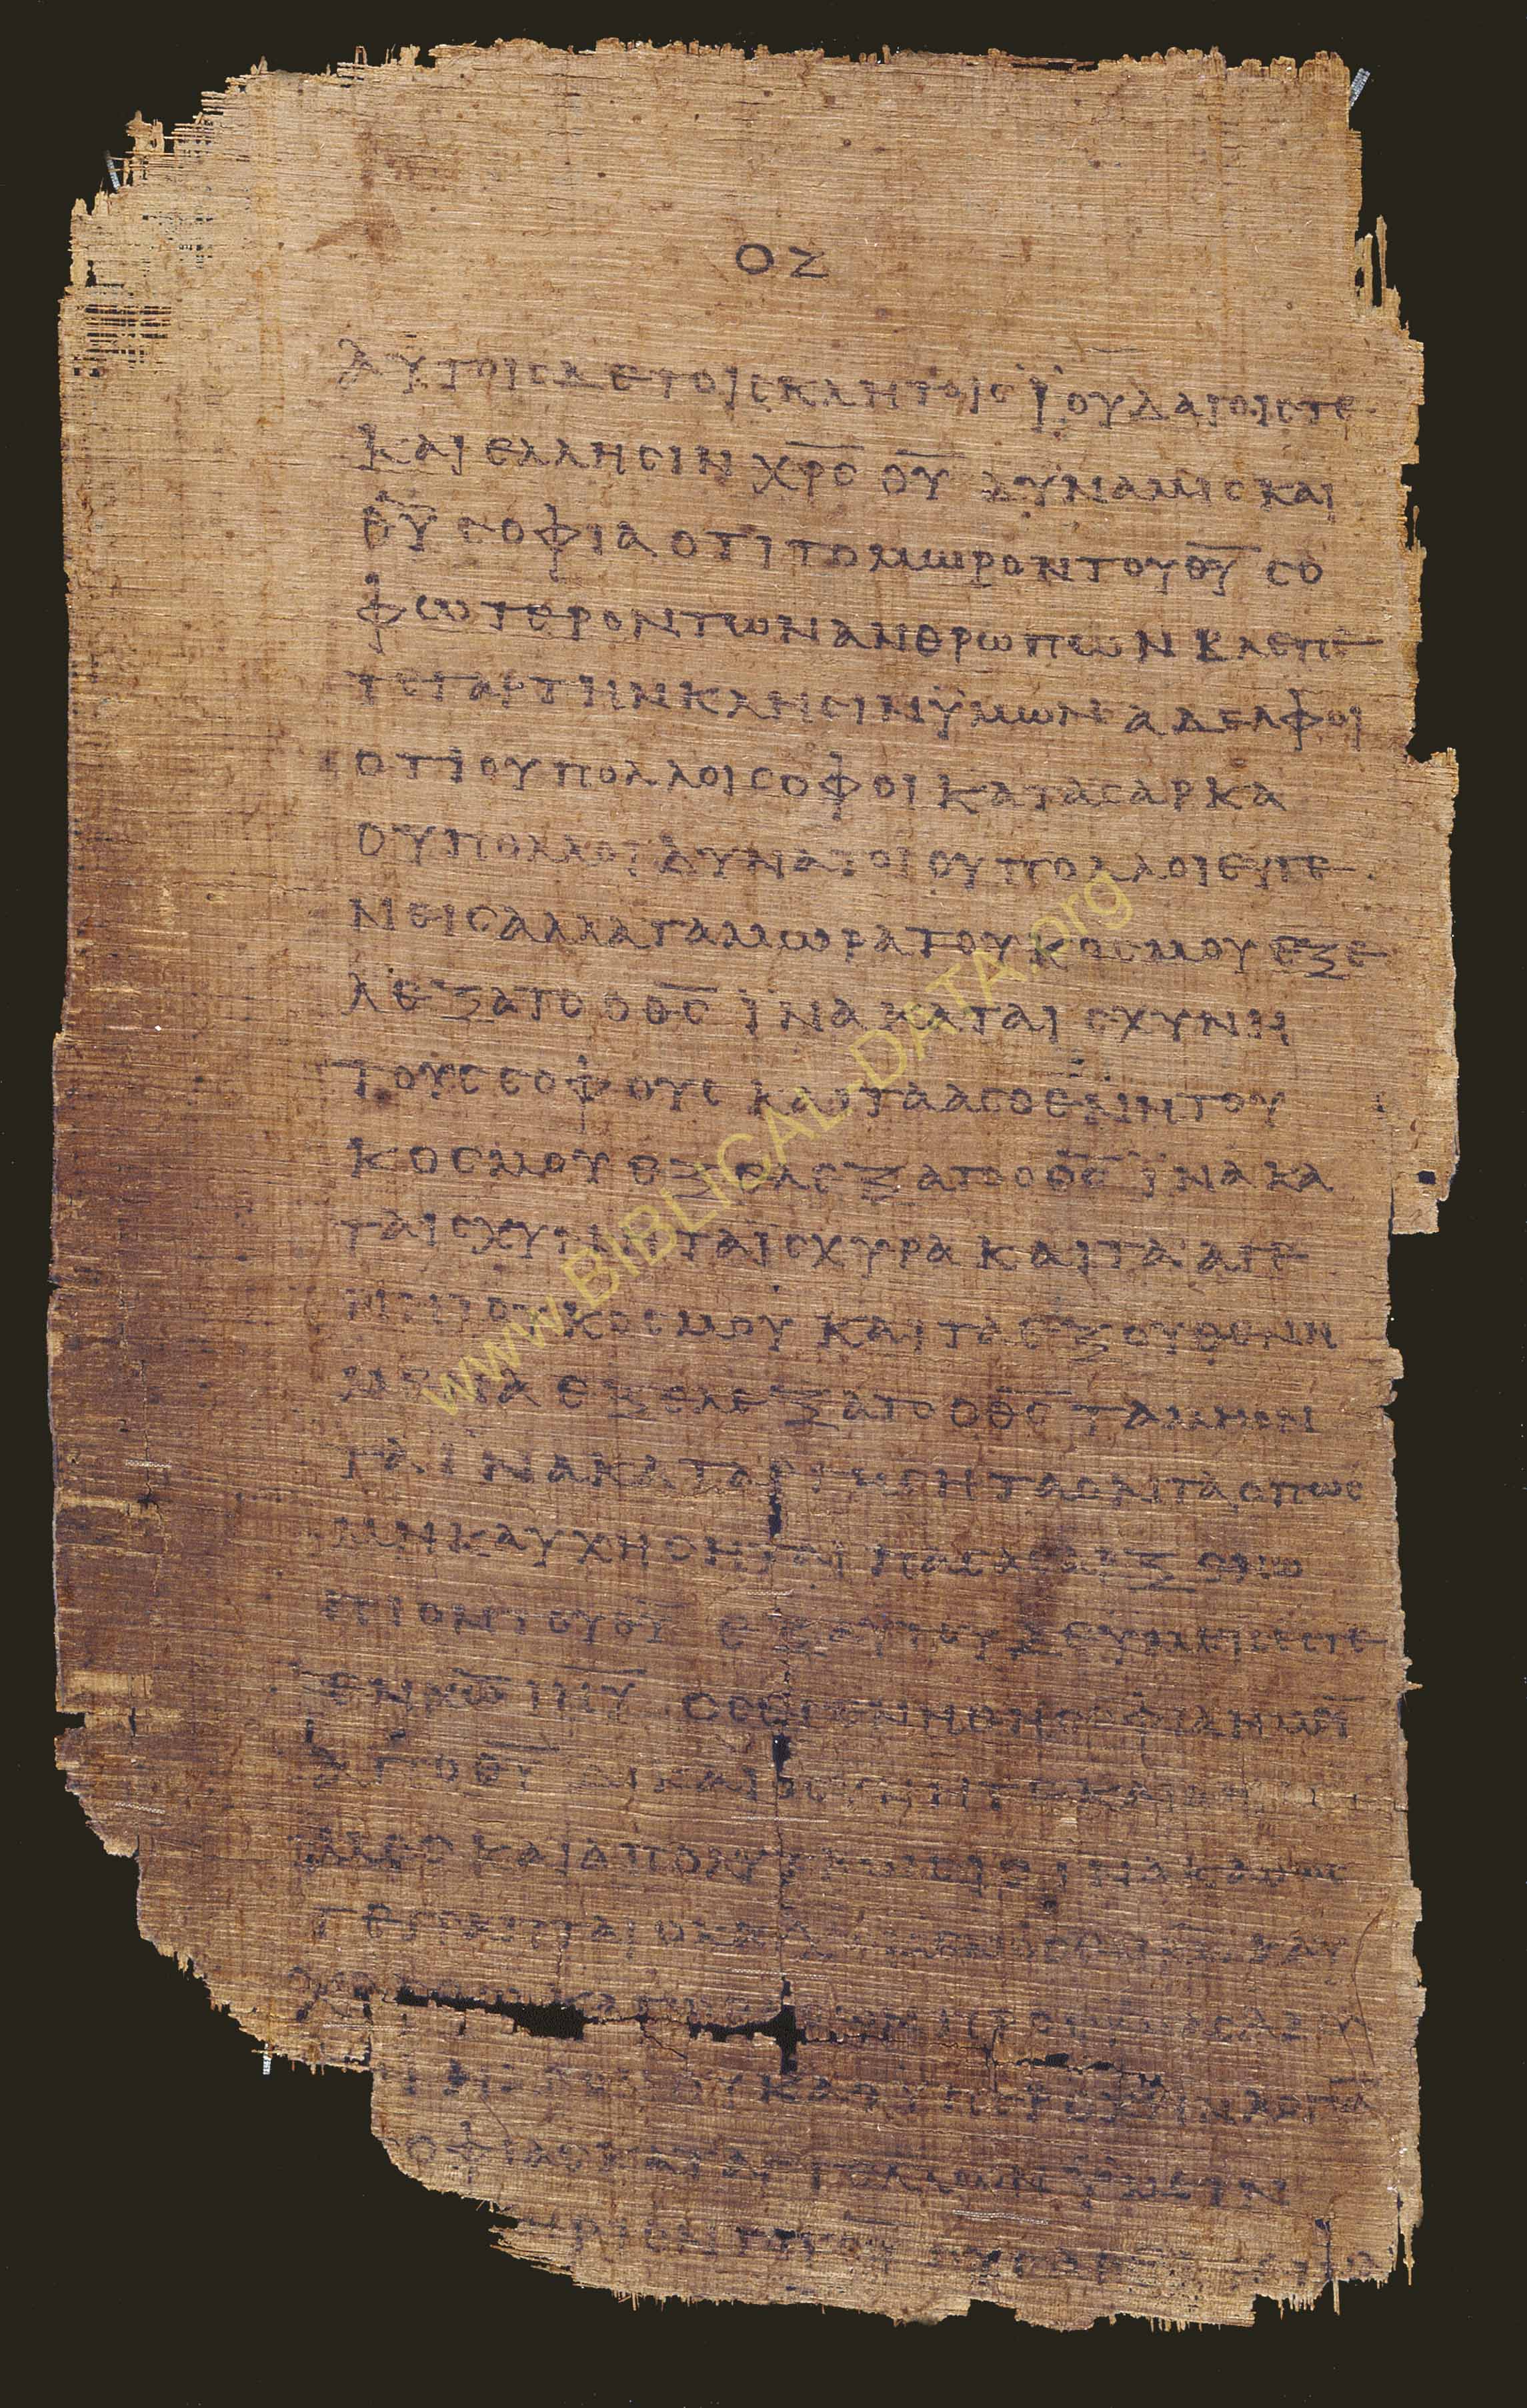
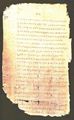
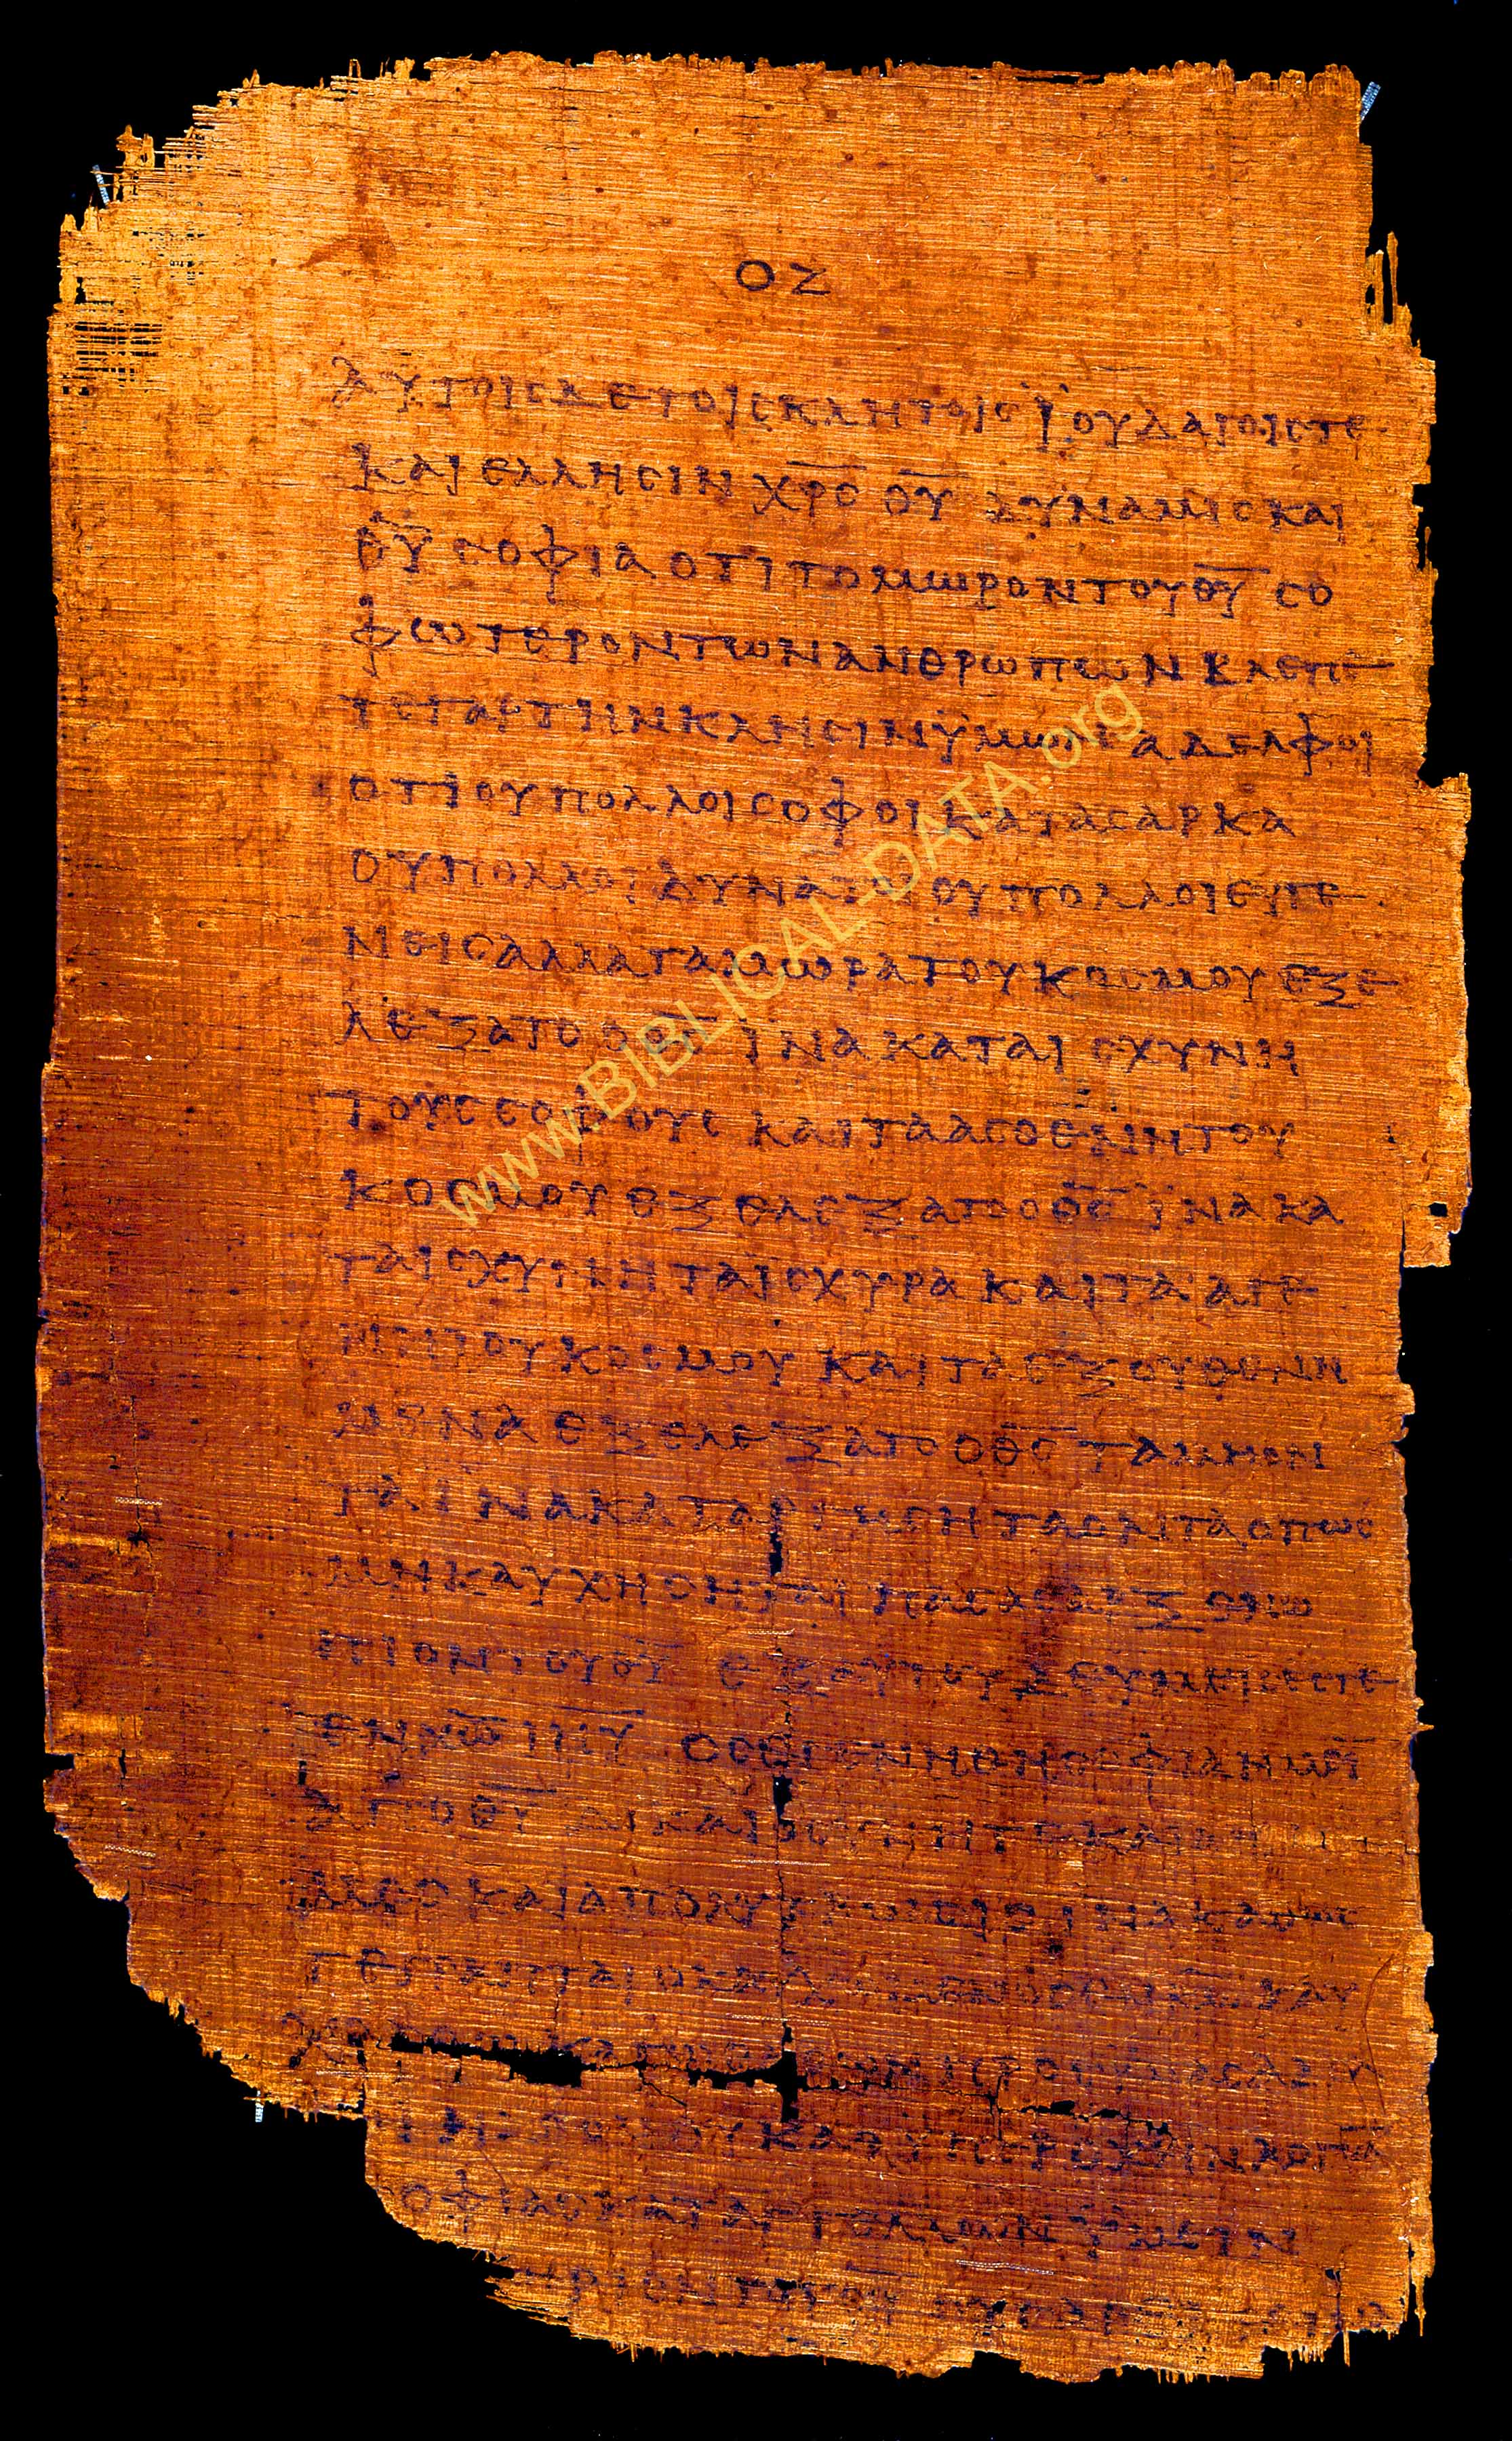
A "pseudo-HDR" image can be generated from a single image, which has been adjusted and saved in three identical copies (yet each copy is altered , particularily the brightness, so that one is very dark , one neutral , and one very light - thus three separate images of the same subject). Below I show some images for a pseudo HDR display, keep in mind that had I 5 to 27 real true separate bracketed images of this manuscript (P 46, folio 39r) then I could really produce DRAMATIC results! But this display will/should whet your appetites. I begin with a 16 megapixel image of papyrus P46 (folio 39r). I make a very dark copy of it, and a very light copy. With the original image, I now have 3 images. I join these images (they can be any 24 bit format, in this case tif) into a single HDR image. In this instance I use the free program QTPFSGUI HDR. Whereas Photomatix has only one tone mapper (similar to a Fattal operator), QTPFSGUI has about 6 various operators. I believe I used the "Reinhard" or "Durand" tone mapper. This is how the image originally appears, reduced and cropped from its TIF original to this jpeg: (with a slight "levels" adjustment made in Photoshop). Image is extracted from an image I bought from the Chester Beatty library in Dublin (see my "Acquiring Manuscript Images/Films" page). They provide very good images of P46, approximately of 16 megapixel size, with more info than I display below.
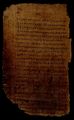
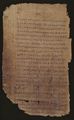
Now, for those of you who have never seen P46 in true color, the above is such an image. It is a bit darker than many of the P46 leaves. It also has some interesting readings, which I discuss in detail elsewhere on this site (www.Biblical-data.org). Below are the three images (shown as thumbs) which I joined to form the pseudo HDR image:
As you can see, with care, you too can use a single good color image with which to begin to generate a pseudo HDR image. Perhaps not as good as 5 real separate image exposures, but still you will see some benefits of producing a tone mapped LDR image! Below is the end result, though it is a compressed JPEG file, you can zoom in and see how much easier to read it is. In fact it is much easier to read! Hence the value of HDR tone mapped to LDR images. Imagine if we had 5 or 7 separate exposures of the original manuscript -- what glorious images we could produce!! But this, below gives you a dim preview of its benefits!
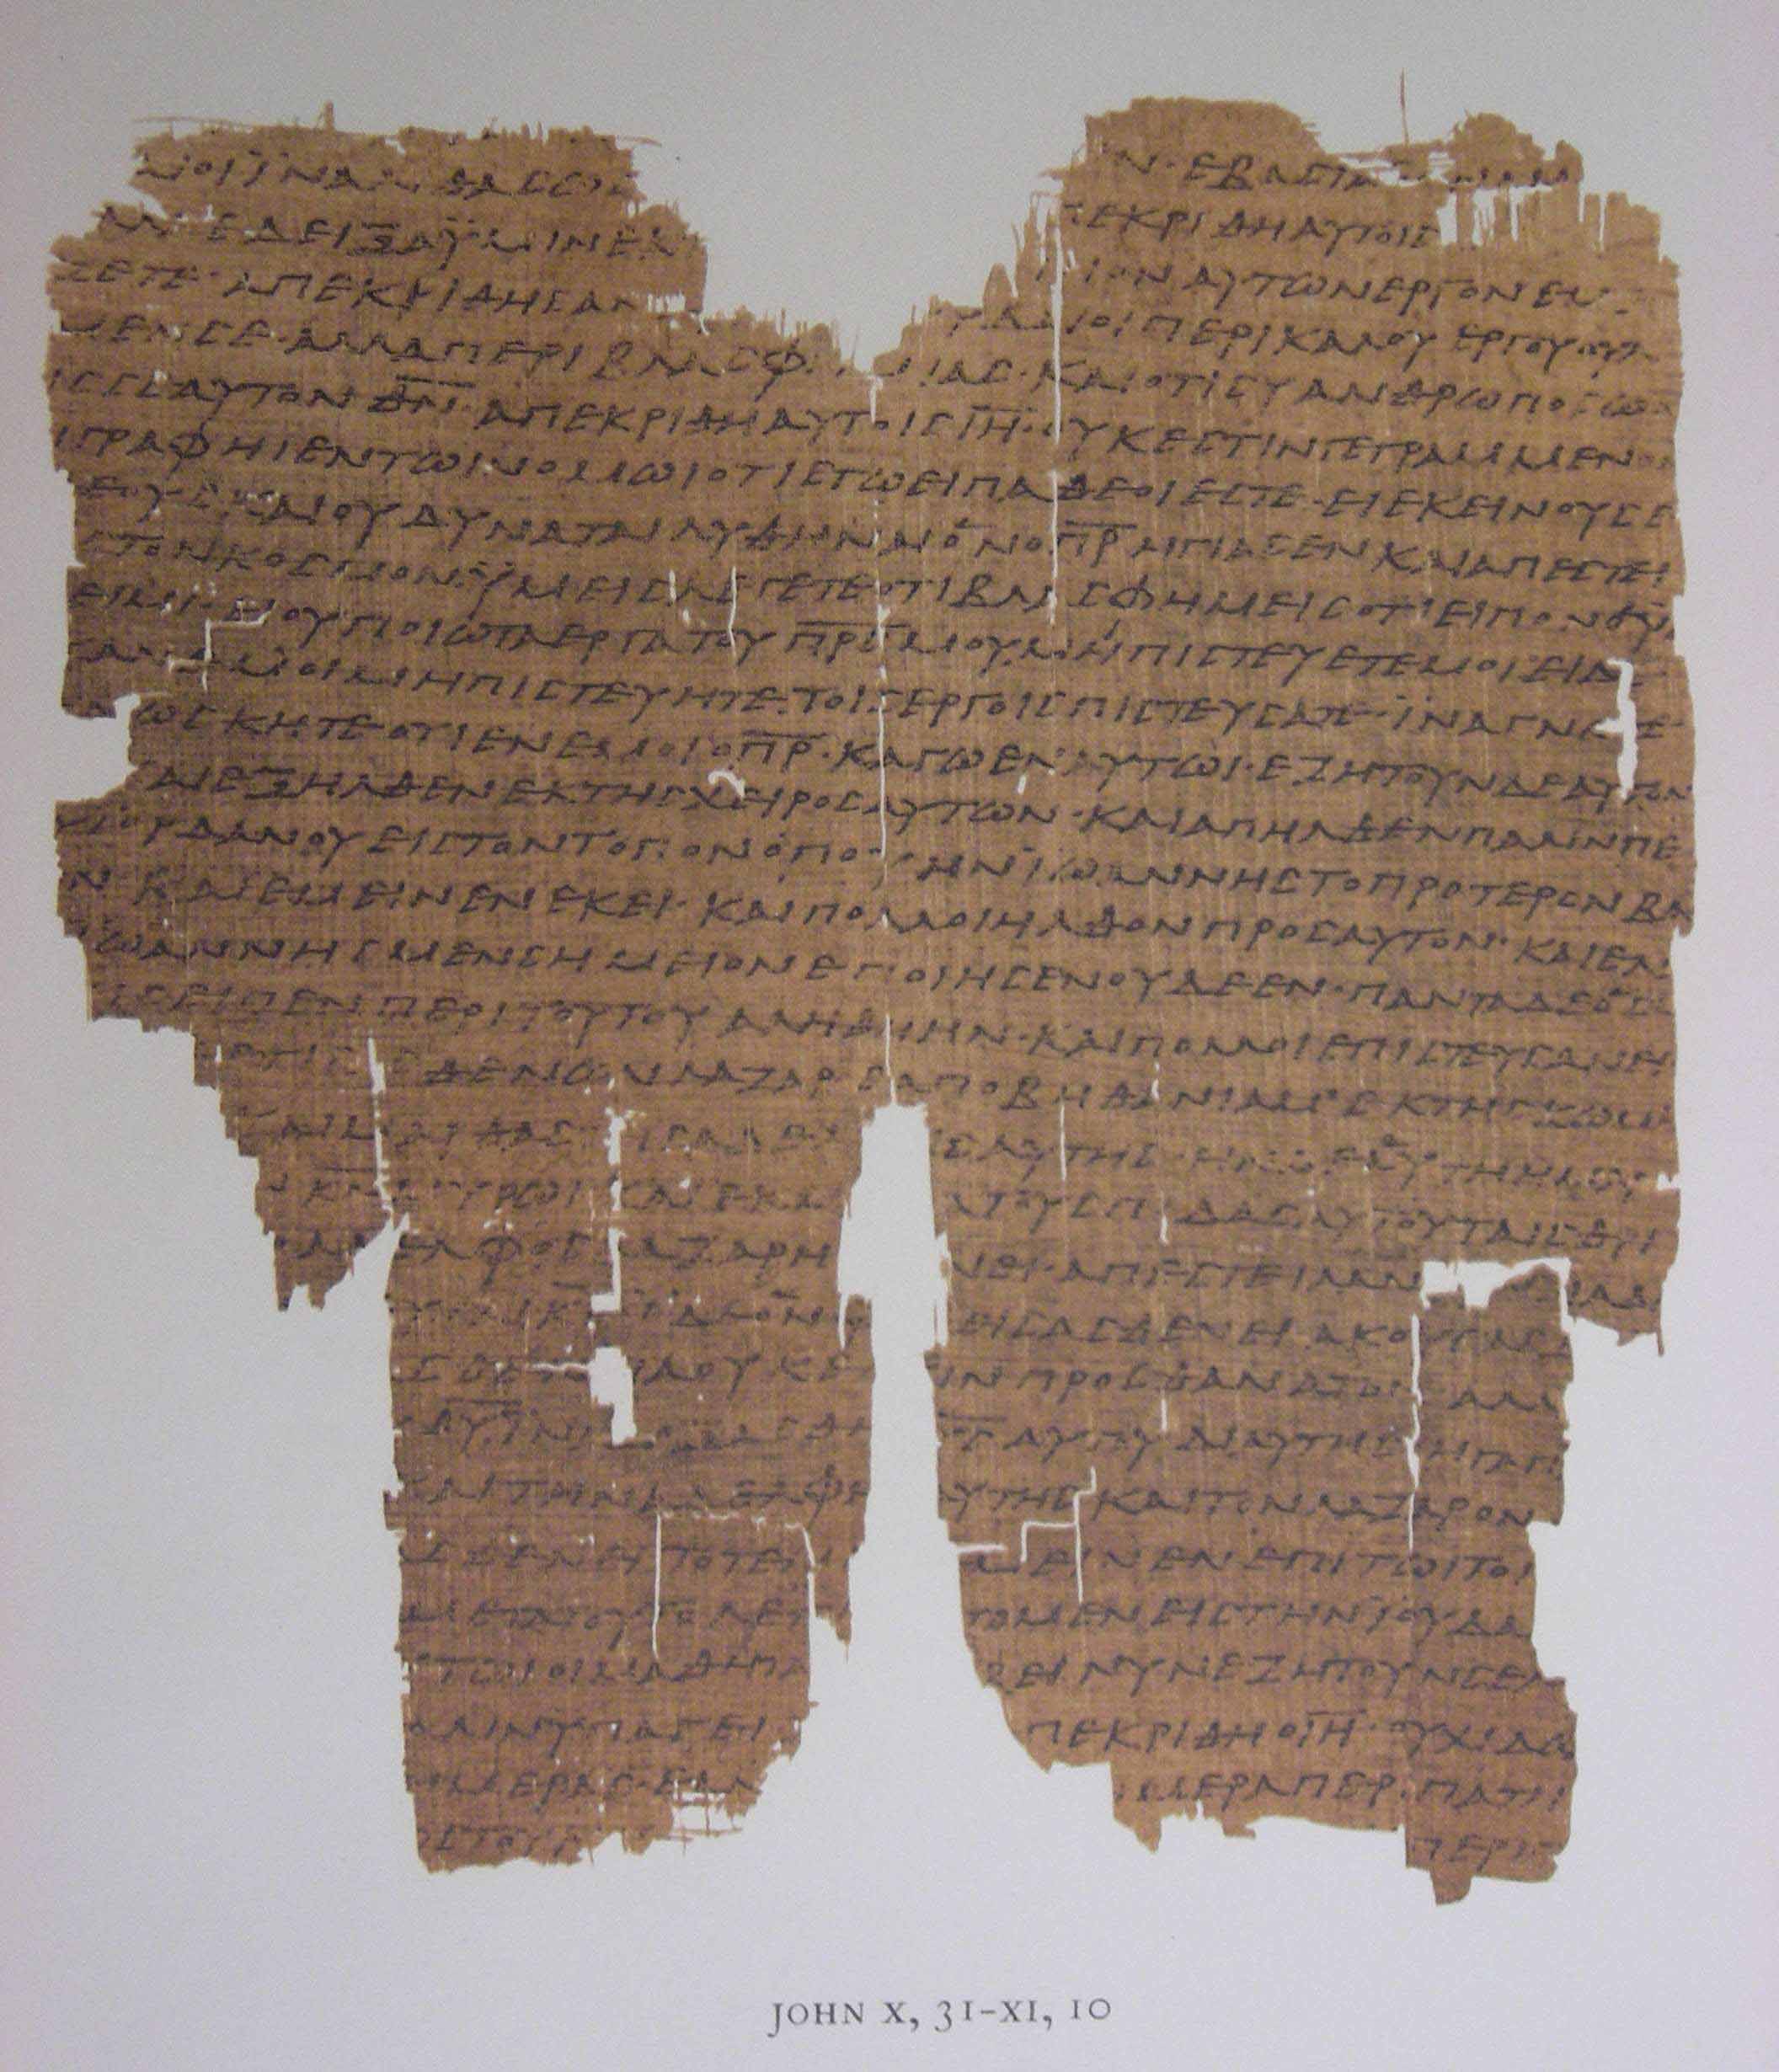
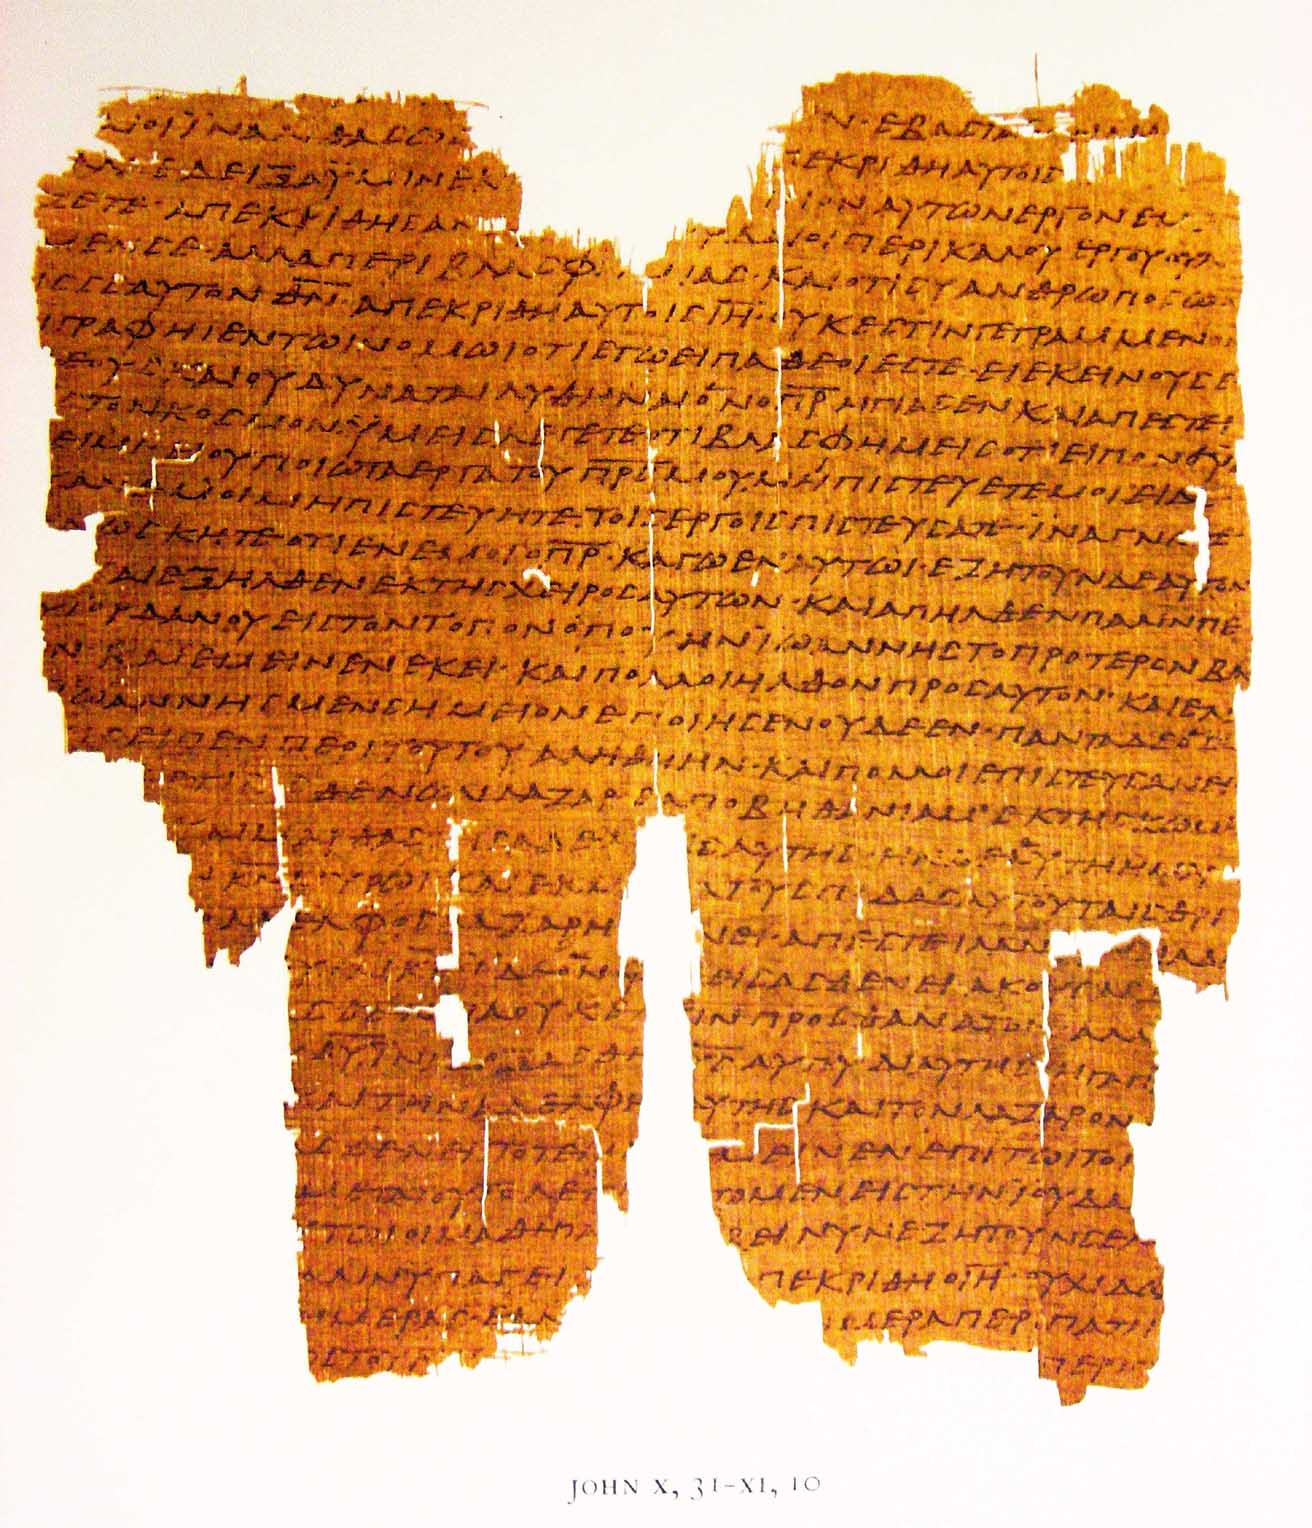
Now, we will agree that there "appears" to be a color shift, and some faint fringing occurs, but overall the results are impressive. Actually, the color is simply filled with more LIGHT, via increased gamma and luminance! As stated, true bracketing with the original manuscript would produce even more amazing results. Users who really know the ins-and-outs of these HDR programs can produce even better results than I. Next, I present side by side two images, both of P45. The original image was shot from Kenyon's published volume(s) on the Chester Beatty papyri. I believe the original printed image is not a true 4 color image. Anyways, I photocopied the leaf, and made a lighter and darker copy. Then joined the 3 into a HDR, then tone mapped it. [thus a pseudo-HDR image]. The results are not as impressive as the above, but all viewers will agree the resulting LDR tone mapped image is better! (It is on the right ;-). These are the results of pseudo-HDR images (not made from numerous actual exposures) but from a single exposure - altered.
I find that the increased luminosity not only clarifies the text, but assists with making visible certain minor marks, such as diareses and small punctualtion marks. These minor improvements can make a major difference when examining an image of a Biblical manuscript! Though I have not yet done so, I am certain that HDR technology can be applied to Multi-Spectral-Imaging as well (MSI), producing even more remarkable results.
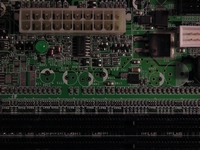
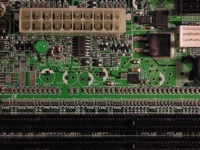
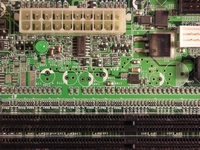
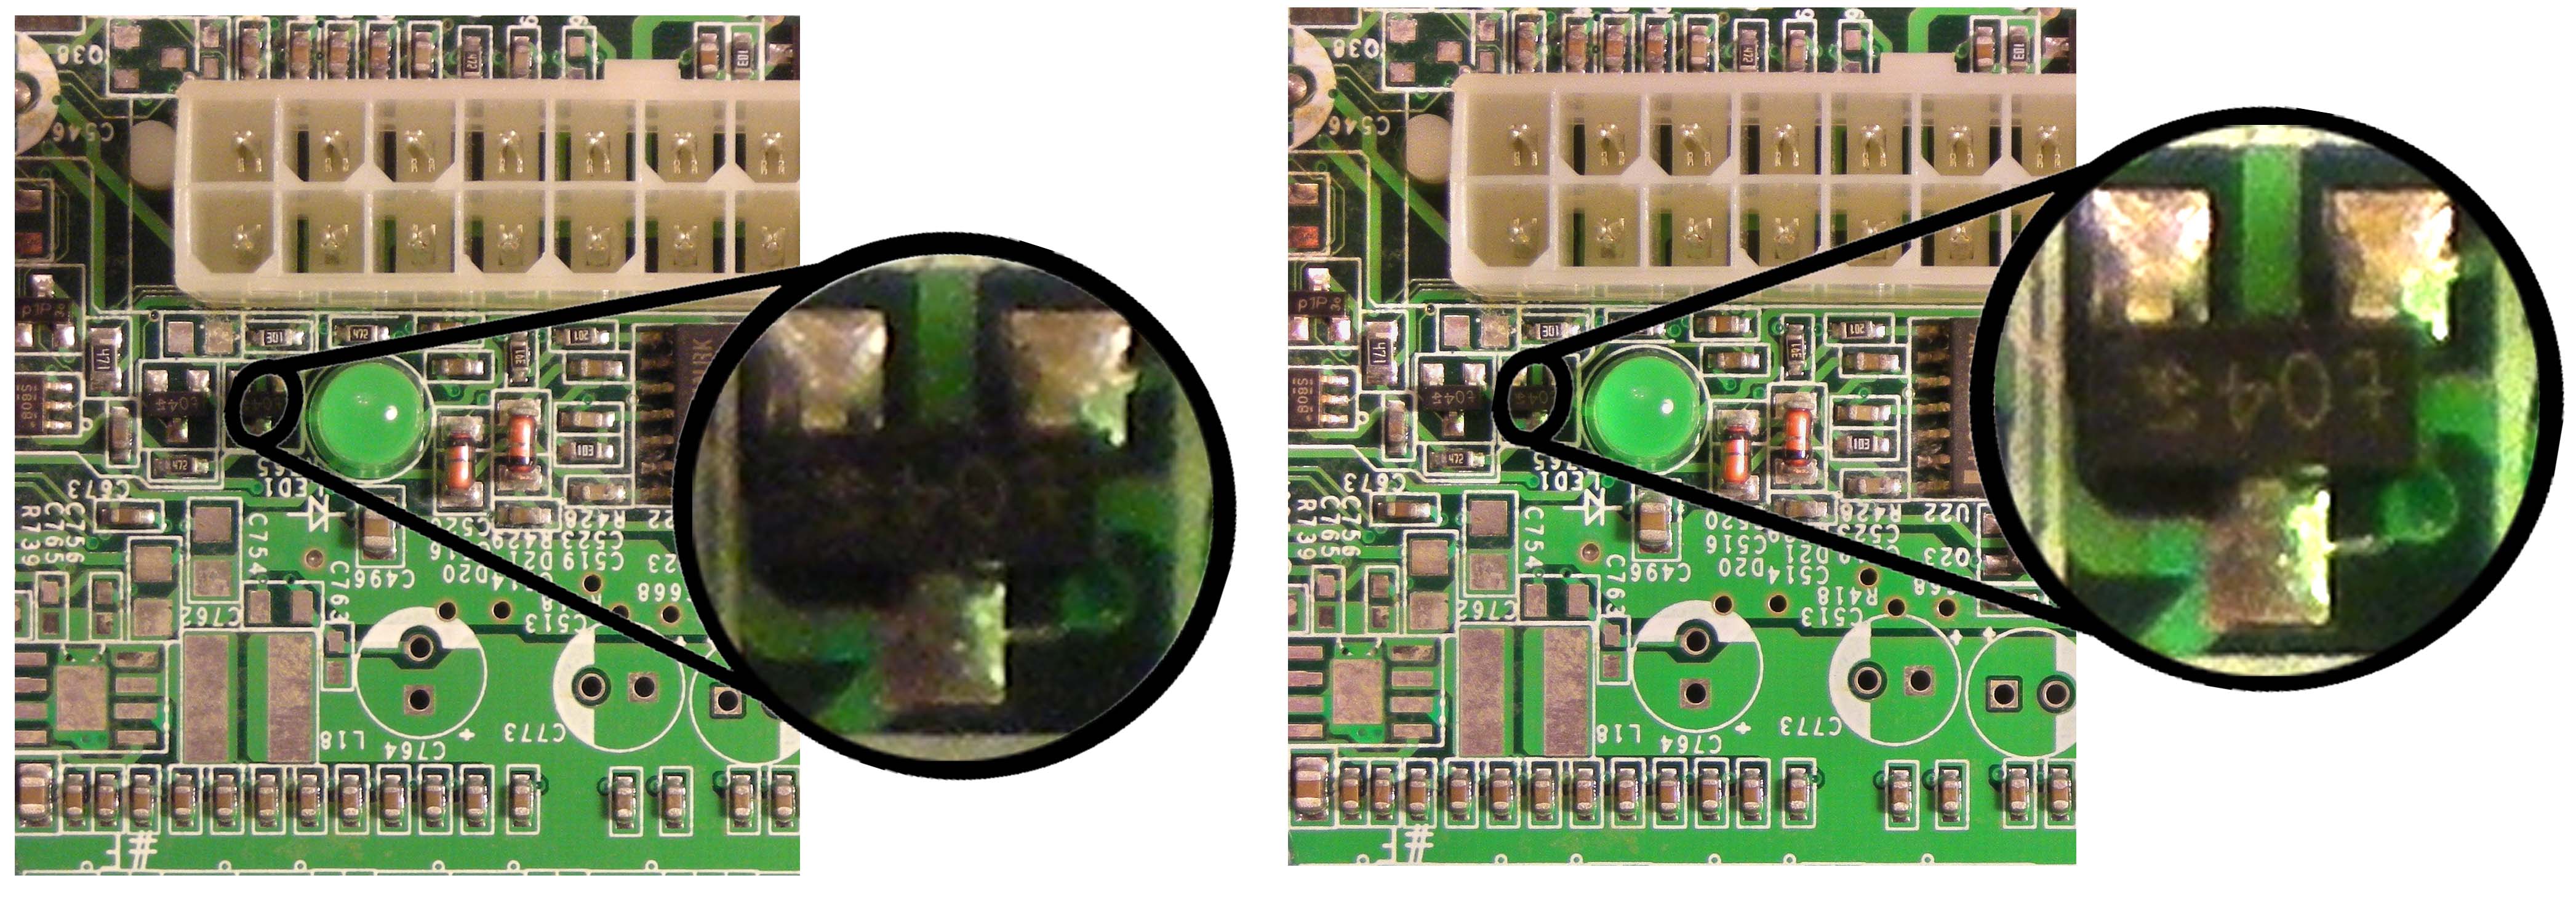
Below, I demonstrate another sample: we shoot 5 actual exposures of a portion of a mother board. This can produce a true HDR image, not a pseudo one! Each shot varied by one full f-stop. We joined them in a single HDR 96 bit image, and then tone mapped it in Artizen. We then compare the tone mapped result with the "0" (neutral) image from the camera. Note that in order for the camera to "see" the markings on the chip, the image elsewhere is blown out, much bright data is corrupted. Whereas in the HDR to LDR image, we can read much better the chip and retain the highlights. All in one image.
We now compare the HDR to LDR, with the "0" EV setting:
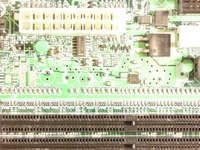
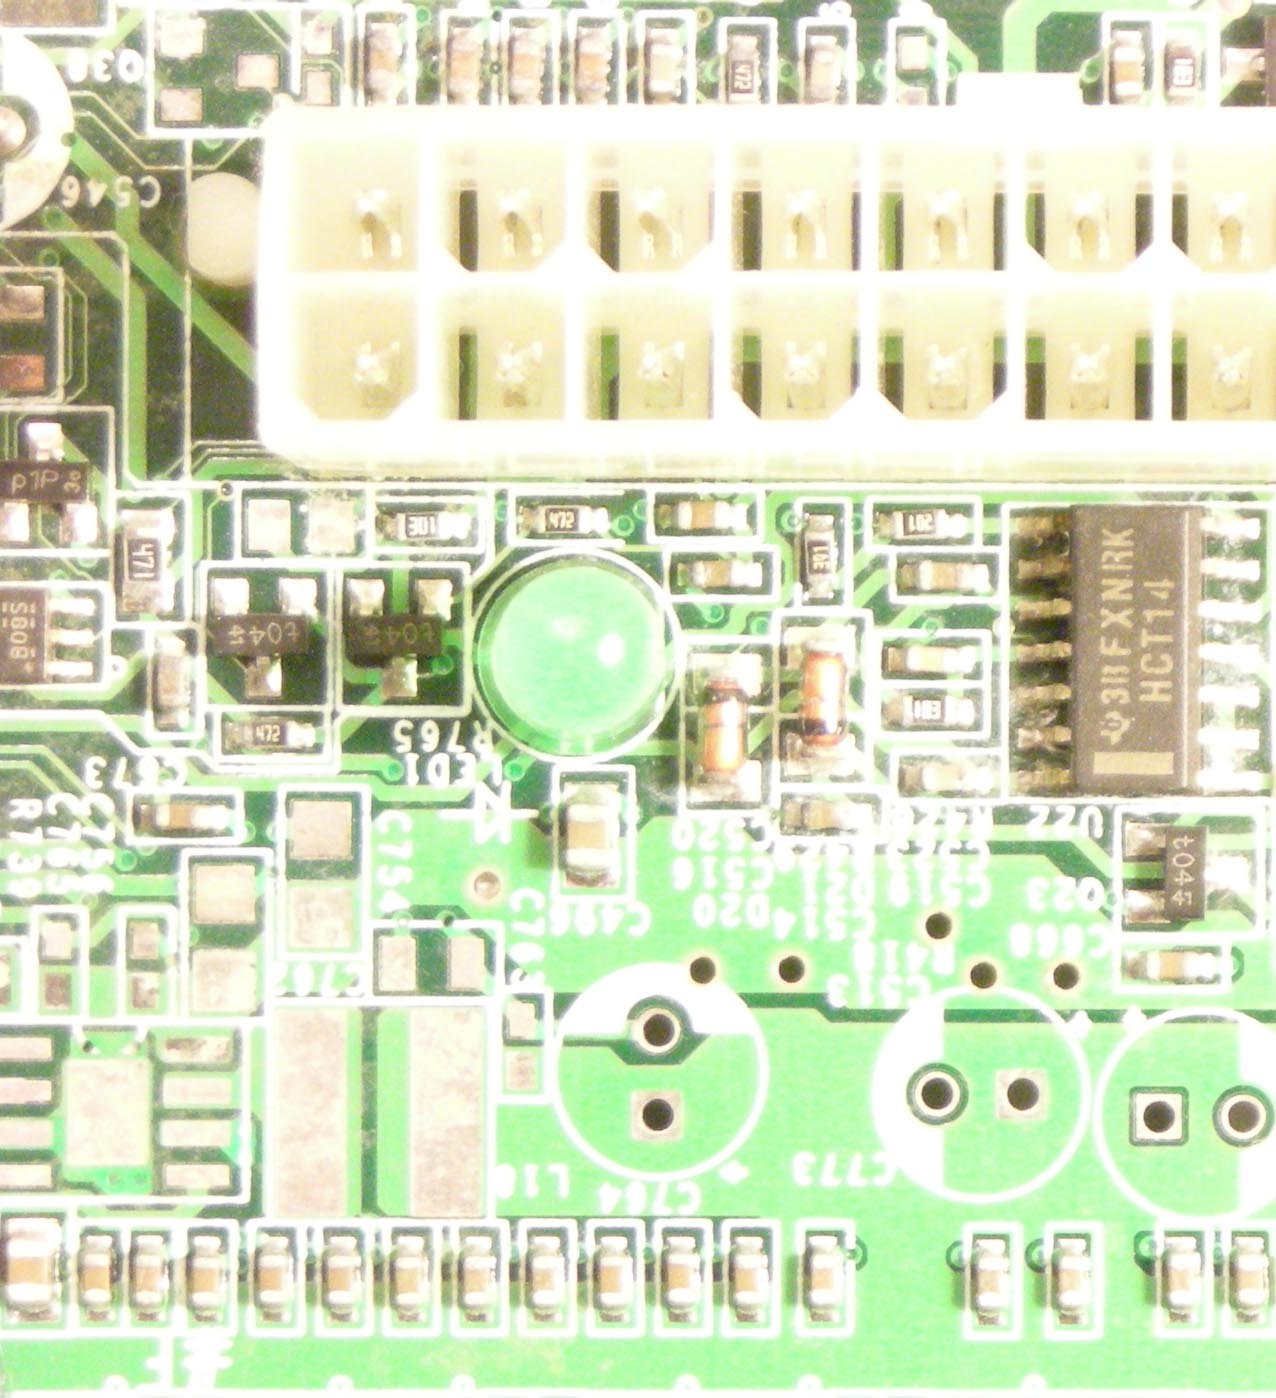
As you can see the HDR to LDR image (on the right) makes the data visible. In the single camera image (the neutral) the data was nearly invisible. So instead of presenting 2 different exposures (so as to read all the highlights and this chip), we can bring out all of the data in a single 24 bit image made from tone mapping a 96 bit HDR image! It is impossible to achieve this balance with any type of levels or contrasts adjustments! In order for the camera to see the data on the chip, it must produce an exposure which loses highlight data, as shown below:
In a Biblical manuscript, there are times when in a single image, some letters are not visible because they lie in a very dark portion of the parchment or papyrus. If properly photographed, the majority of the text will be properly exposed, yet the area in the darkened portion may be lost. With HDR technology, we can illuminate that darkened area AS WELL AS RETAIN THE PROPER EXPOSURE IN THE MAIN BODY, all in one image!! This solves a common imaging problem as concerns the imaging of Biblical manuscripts.
In the end, we end users, can apply some adjustments to increase the data potential seen in copies of color images of Biblical manuscripts. Without the actual manuscript (to shoot numerous bracketed images) we must use an inferior method - pseudo tone mapping. However, even pseudo-tone-mapping, can help in numerous cases. Those who actually shoot manuscripts can now present the data far better! (with some extra effort). Below is a list of tools, information and links. You too, can download various softwares and begin experimenting with HDR. Those fortunate few who actually photograph ancient Biblical documents, have now tools for producing much better results! Let the bracketing begin.
|
|
TOOLS for HDR
PHOTOMATIX Costs about $99.00, a trial download is available. Runs on Windows 98 SE and newer versions of Windows. Can join multiple images into a single HDR, and can then tone map same image. Allows for good editing of the tone mapping process. Has good batch editing abilities, IF you have a powerful computer with lots of RAM. A very good program, stable. A free version is also available, but it just joins 2 exposures WITHOUT HDR, and without tone mapping (of course): this is known as simple "blending". website - http://www.hdrsoft.com/
ARTIZEN HDR A versatile program which can join images into a single HDR and then apply various tone mapping operators, as well as pseudo-tone-map a single image! Cost is about $59.00. Can also apply different image editiong functions after tone mapping. One problem with the versions up to 2.5.2, they will not open or process images larger than about 10 megapixels. Good for smaller images (made with 3 - 9 MP cameras). Another problem, I have noticed, prog does not correctly release RAM when finished, thus after processing 1 or 2 images, the program states that it is out of memory or some other error, you must then shut down computer and restart, and it is then ready for the next image. They state that their newest version (2.5.4) corrects these problems, we hope so as this is a great program with great tone mapping operators. Trial download available. Current versions do run on Windows 98 and newer versions of Windows. Take it for a spin, if you like it, the price is currently very low IF it now handles the memory correctly. website - http://www.supportingcomputers.net/
HDRShop Version 1 is a free program, it can view and create HDR images, but cannot tone map. Version 2 is able to do much more, but it costs (I forget how much). It is a good program! Runs fine on Windows 98 SE and newer, but often leaves large temporary files lying about. Thanks to the folks in the University of Southern California system! website - http://gl.ict.usc.edu/HDRShop/
QTPFSGUI A totally free application. Runs on, Win 95/98/NT/ME/2000/XP, Windows 10, is stable and produces great results. It can create the HDR image and then tone map it. It has about 6 tone mapping operators. It supports a wide range of HDR output formats including OpenEXR, Radiance RGBE, Tiff formats, Raw image format and PFS native formats. It allows you to create a HDR file from a set of images (such as JPEG, TIFF 8bit and 16bit, RAW) of the same scene taken at a different exposure settings. You can save, load, rotate and resize HDR images. This is version 1.8.8. On my "Softwares" page I have placed a complete copy of the program, with all of its needed DLLs. All you need to do, is download the zipped file, create a folder on your hard drive to place the program in, make a desktop icon, and you are ready to go, it does not install or add into any other folders (no added system files et cetera). It runs on systems with not much memory, but it will gobble up a gigabyte of RAM pretty quick. With less than 512 MB of RAM it runs okay, but somewhat slow. If you live on my budget, or can spend $10,000 per day for years, this is the program to download, though free it works very very well. When adjusting the tone mapping operations, it has a viewing panel which can preview various smaller proxy views [which proxy views can be adjusted up to a large size!] , which really assists with systems with less than a gigabyte of RAM. I highly recommend this freebie! this link is to my download section (scroll to the link named QTPFSGUI). Link - SOFTWARES
SILVERFAST HDR Studio I include this program as it is useful, but it is not, I repeat NOT a true HDR prog. It allows users to open and edit a 48 bit RAW image, and then to save it as a regular 24 bit image (Jpeg, BMP, TIFF, et al). However, as a standalone image editor, for regular 24 bit images, it produces some very nice results! Very nice. It is highly recommended for those who shoot and edit their camera images in RAW format. It is most useful for working with 48 bit scans of Kodachrome 35 mm slides and Black and White negatives, from high resolution scanners and drum scanners. HDR studio does not create the 48 bit images, it edits existing scans/images. It typically likes lots of RAM. It is strong at color calibration, and respects ICC profiles. It is not cheap, it retails for about $499.00. Up to and including versions 6.4.5 it will run on Windows 98SE, but above 6.4.5 it requires Windows 2000, XP and should run on Vista. It also runs on MAC OX systems and newer. Good luck for finding the older version of HDR Studio for Windows 98 SE, they will sell you a copy from their home site in Florida for about $175.00, call for particulars, the phone number is 941- 921- 4815 (this is their current number!). The HDR version of SilverFast is just like their scanner drivers (as in Silverfast 6 Ai), but it is designed to open and edit high-bit RAW images using the same tools and processes available in their scanning program Silverfast Ai 6 version. These folks confuse the phrase "High Dynamic Range" with RAW, a common mistake. A HDR image, recall, contains 96 bits total before tone mapping. There are two primary advantages HDR Studio has over Photoshop to adjust and color correct RAW image files: (1) is that SilverFast opens a nice small proxy preview image from the whole( 320MB for example) file, so as you work with it the system is not taxed by processing all of the data in that big 320MB file. (2) you can apply all of the adjustments using the SilverFast tools in order (a sequence) and cumulatively. This allows you to adjust each aspect of the image quality to achieve a finished image, all via a smooth continuous work flow, including sharpening and if necessary using SilverFast�s GANE (grain and noise reduction) and ACR color restoration. Many of these tools also work on regular 24 bit images as well. These are good adjustments, better than most other image editors, but are NOT tone mappers. As this prog cannot open true 96 bit HDR formats. website - http://www.silverfast.com/48bit-hdr-software/
DYNAMIC PHOTO HDR (version 4.5, per year of 2009) From -- www.mediachance.com --, comes this fine application. It is stable and runs well. It costs about $50.00, and is worth the price. It has a nice help file, and is easy to use! It has some very nice effects, such as "Halo-matix" and "High" Contrast", and numerous others. It also does batch processing. I am not certain if this version runs on Windows 98, I tested it on Windows XP.
The programs I discussed above, (except, Dynamic Photo HDR) can run on Windows 98 SE. Other HDR editing programs are: (these listed below do not run on Windows 98SE).
Photoshop (CS2 and above) and CinePaint and Radiance (Linux and Mac only) and Photogenics And other programs can open, create, and edit HDR images.
OTHER TOOLS/data
Ever try to open some TIFF image, only to be told that the format is not supported? Often many programs including Photoshop, cannot open many of the various high bit TIFF image file formats. These three free programs below assist, they can also be found in my "Softwares" page for downloading. Several high-bit tiff formats can be used to store HDR images ( 32 bits per channel!). Such as -- FloatingPoint.Tiff, and LogLuv.Tiff.
HDR View (to download go to my "Softwares" page, and scroll to HDRview.zip) Formats supported: Gregory
Ward Larson's red-green-blue-exponent format (.pic, .hdr) A simple high bit image viewer, but it opens Floating Point Tiffs, as well as other files shown above. Runs on Windows 98 SE and newer. It will not open the LogLuv tiff formats. For that chore (besides some of the HDR softwars listed above) we have:
LILY VIEW (version: 0.6.5) Unique
Features
LILYview can display "High Dynamic Range" image data (i.e. TIFF LogLuv) with brightness adjustment.
LILYview can add a signature to TIFF, PNG and PNM image files. Lily View is free and runs on Windows 98 SE and above. It is a very simple viewer, uses few system resources, and I include info files in my download. Go to my "Softwares" page and scroll to LILY_VIEW.zip.
AWARE SYSTEMS TIFF TAG VIEWER Still having problems identifying that mysterious TIFF file format? This simple program shows you in text/table form what type of a TIFF file you are dealing with! There are many many TIFF file formats, some proprietary, this tag viewer views quite a few of them, but not all. Give it a try. Runs on Windows 98 SE and above. Go to my "Softwares" page, and scroll to TIFF_TAG_VIEW.zip, to download. Nothing to install, just copy it to your hardisk, and click on the .exe.
openexr.com (via Industrial Light & Magic) OpenExr is a file format developed by the wizards of Lucas's Industrial Light & Magic film makers. They have made available a plugin for Photoshop to view and edit their format. This is a 96 bit HDR format. Some of the programs listed above create and save to the .exr format, and it is becoming a fairly popular format for HDR images. This plugin works in Photoshop versions 6 and above (it may work on versions 4 and 5 also, I have not tested it for these). There is an "INSTALL" file in the zipped download, use it first. After you copy the "exrformat.8bi" into your Photoshop\plugins folder -- you will then be able to view and work with exr files. When you try to open an .exr image file in Photoshop, the plugin automatically activates. I have a copy available in my "Softwares" page, navigate to OPENexr PLUGIN, to download the exrformat.8bi plugin. The plugin and more information is also available from the creators at : http://www.openexr.com/ -- (from Industrial Light & Magic)
IN CONCLUSION: There you have it. As the years pass, HDR will be seen in all magazines, movies and any imaging media. It is already widely used in many of the newer computer assisted-produced movies on the big screen. Photographers drool over its tremendous enhancements and possibilities! High-end graphics corporations already widely employ it. NOTE: This page was created in 2009, and I predicted then, that HDR will be used to create better movies. Below is a copy of the front of a recent - 2019 - DVD cover. And as predicted, it uses the HDR quality!!
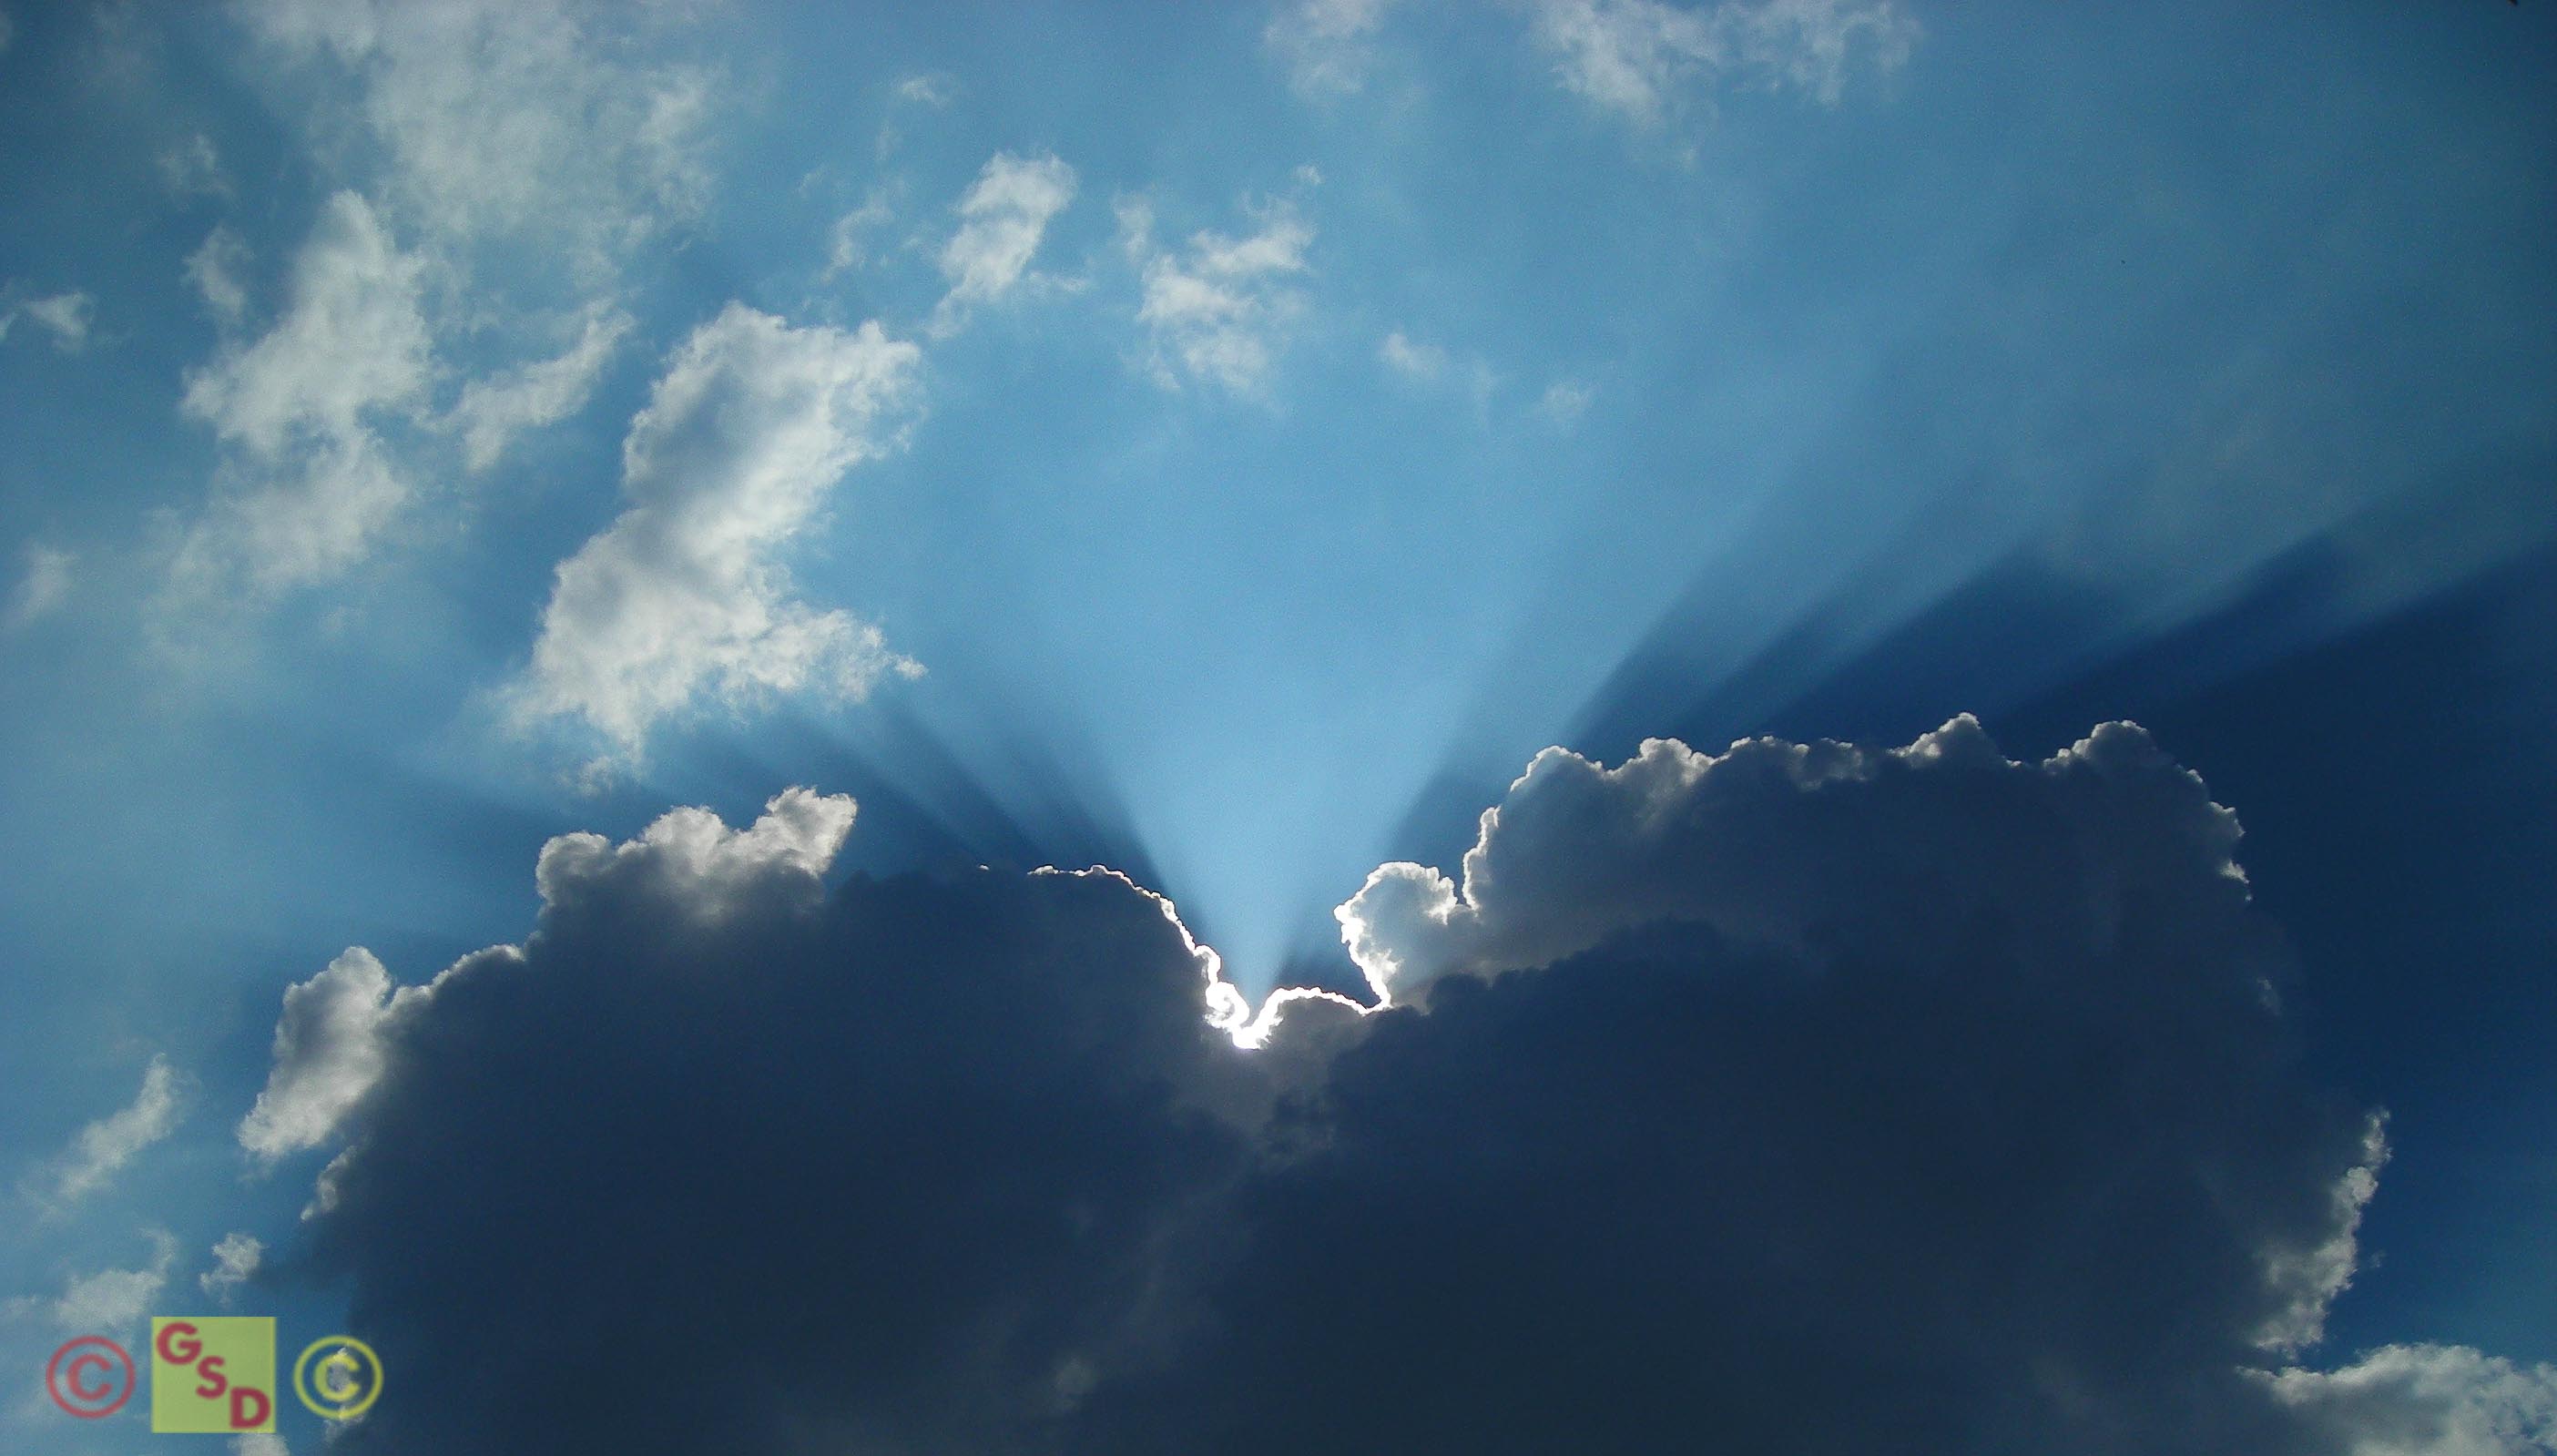
However, in my mind it is far more useful for clearly viewing and clarifying ancient Biblical manuscripts images!! I (Gary Dykes) began photographing things in 1962. I advanced to a Petri Flex 7, 35 MM camera in Vietnam, but that great camera was later stolen. [really, the PETRI FLEX 7, was/is a great camera]. Later, I purchased a completely manual Pentax K1000, and used it for years. I sold it, and now shoot exclusively in digital format. Below is a sample of one of my images, without HDR: it is from a digital camera -- a great and very easy to use Nikon point-and-shoot. EV set to -1.3. The image has had no modifications. (Other than my copyright notice).
The above is a shot of the Tennessee skies, the image is "as is" unaltered from a digital camera; it reminds me that the Lord Jesus Christ shall return and remove His saints from this doomed planet - this event is known as the rapture. Then seven years later (after the tribulation) the King Jesus Christ sets up His 1,000 year Kingdom on earth. After which comes the judgment, and then a glorious NEW creation, free of all darkness and sin!! Something to look forward to. So I look up at the skies often!
|